Your Guide to 300 Gallons Water Tanks
When you start looking at a 300-gallon water tank, you’re entering a sweet spot for capacity. It’s a serious amount of water, perfect for everything from serious gardening and rainwater harvesting to keeping a small farm running or being prepared for an emergency.
This isn’t a small-time container; it’s a significant upgrade that can keep a family supplied with water for a couple of months or get a large garden through a nasty dry spell. The designs are generally built with smart storage and easy handling in mind.
What a 300-Gallon Tank Really Means for You
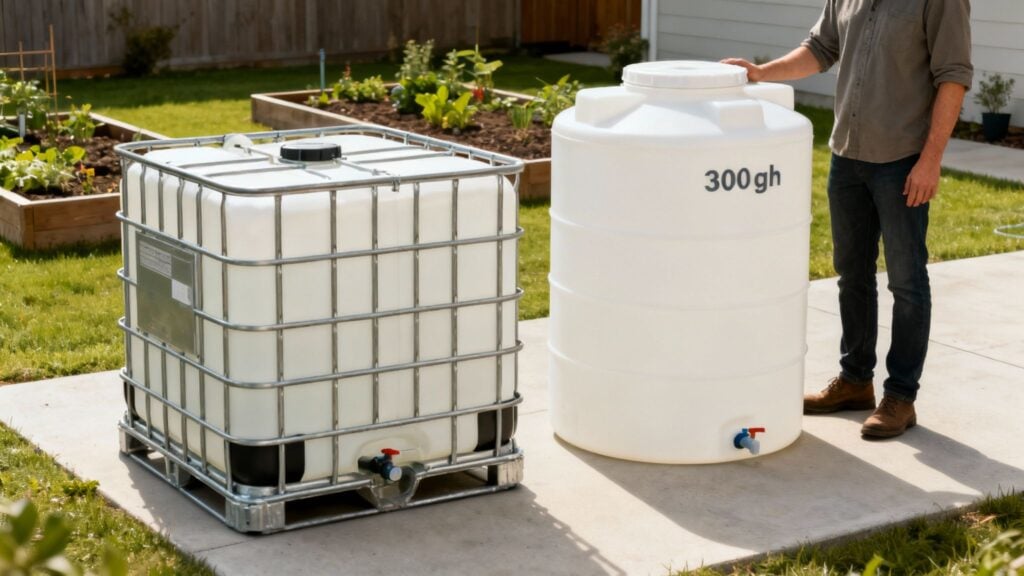
Before we dive into the specs, let’s get a feel for what 300 gallons actually looks like in the real world. This is a versatile size that nicely bridges the gap between smaller residential barrels and much larger commercial tanks. A single one of these holds enough water to genuinely improve your water security or make your operations run smoother.
Keep this in mind: a US gallon of water weighs about 8.34 pounds. That means a full 300-gallon water tank is holding just over 2,500 pounds of water. That’s a hefty number you absolutely need to plan for when you’re thinking about where to put it and what it’s going to sit on.
Two Common Designs You Will Encounter
As you shop around for a 300-gallon tank, you’ll notice two main styles pop up again and again. Each one is built for a different job, and knowing the difference is the key to picking the right one.
The two main players are:
- Intermediate Bulk Containers (IBC Totes): These are the true workhorses you see everywhere in agriculture and industry. You can’t miss them—they’re the plastic tanks sitting inside a protective metal cage. They’re built for both storage and transport.
- Standalone Poly Tanks: These are usually round or rectangular plastic tanks made for long-term, stationary storage. They’re a popular choice for rainwater collection setups and as permanent water reserves on a property.
Think of an IBC tote as the multi-tool of water tanks. Its cage makes it portable, stackable, and tough enough for almost any job. A standalone poly tank, on the other hand, is more like a dedicated reservoir—it’s designed to stay put and be a reliable source of water.
Matching the Tank to Your Needs
So, why does this difference matter so much? It all comes down to what you plan to do with it.
The cage on an IBC tote gives it incredible strength, making it perfect for moving around with a forklift, even when it’s completely full. You’ll see them on farms getting water out to livestock, or on construction sites tamping down dust. The built-in pallet base is a game-changer for shipping and handling.
Standalone poly tanks are a different beast. They’re often chosen for looks and their knack for blending into a permanent installation. They’re the tanks you see hooked up to a home’s gutter system or sitting quietly as a backup water supply. Their job is simply to hold water, not to go anywhere.
Once you decide if you need to move your water or just store it, you’ll know exactly which style of 300-gallon water tank is the right fit for you.
Choosing Your Ideal Tank Size and Footprint
When you start looking at large water tanks, you’ll probably notice that the sizes aren’t random. They often come in very specific capacities, like 275, 300, or 330 gallons. There’s a really practical reason for this, and it all comes down to efficiency.
These tanks are built to fit perfectly onto standard shipping pallets. Imagine trying to load a truck with oddly shaped boxes—you’d waste a ton of space. A 300 gallons water tank, especially the IBC tote style, is designed with a base that fits a pallet like a glove. This maximizes every inch of space in a truck or warehouse, which ultimately helps keep shipping costs in check.
From Gallons to Physical Space
Knowing a tank holds 300 gallons is one thing, but picturing how that massive container will fit on your property is another story. When it’s full of water, that tank weighs over 2,500 pounds. So, its footprint—the amount of ground it covers—is a critical detail you need to figure out before you buy.
Will it slide into the bed of your pickup? Can you tuck it beside the barn without it getting in the way? You need to know if it’ll fit where you want it to go. For a closer look at the exact numbers, our guide on IBC tote measurements has all the specs you’ll need to plan everything out.
Comparing Common Water Tank Sizes
To help you land on the right tank, it’s useful to see the most common sizes compared directly. A 300-gallon tank is an excellent all-rounder, but sometimes going a little bigger or smaller is the smarter move for your specific needs. The difference of just 25 or 50 gallons can matter a lot, both for water storage and for the physical space the tank takes up.
Here’s a simple table to show how the most popular tank sizes stack up against each other.
Comparing Common Water Tank Sizes
| Capacity (Gallons) | Approximate Footprint (L x W x H) | Best For |
|---|---|---|
| 275 Gallons | 48″ x 40″ x 46″ | Great for situations where you have a height restriction or need to move the tank often. This is the most common size in shipping and logistics for a reason. |
| 300 Gallons | 48″ x 40″ x 50″ | A perfect middle-ground. You get a bit more water than a standard 275-gallon tote, but it still fits on the same standard pallet base. It’s a fantastic choice for general farm, garden, or job site use. |
| 330 Gallons | 48″ x 40″ x 53″ | This one is all about getting the most storage possible on a standard pallet footprint. It’s ideal for stationary setups like a large rainwater harvesting system where every extra gallon is a bonus. |
So, what’s the big takeaway here? Notice how all these common IBC sizes share the exact same 48″ x 40″ base. The extra capacity simply comes from making the tank a few inches taller.
This is great news because it means you can often get more water storage without having to find a bigger patch of ground to place your tank on.
Ultimately, picking the right size is about balancing how much water you need with the space you actually have. By measuring your area first and comparing it to these common footprints, you can find a 300 gallons water tank—or one of its cousins—that’s a perfect fit.
Choosing the Right Material for Your Water
The material your 300-gallon water tank is made from is more than just a spec on a data sheet—it’s the single most important factor in keeping your water safe and clean. Get it wrong, and you could end up with leached chemicals or a tank that breaks down under the sun, compromising your entire water supply.
For water storage, the undisputed champion of materials is high-density polyethylene (HDPE). This isn’t your average plastic. It’s a seriously tough, durable polymer that stands up to chemicals and harsh UV rays. Think of it as the ultimate shield for your water, protecting it from the elements and potential contamination.
What Does “Food-Grade” Actually Mean?
You’ll hear the term “food-grade” thrown around a lot, especially when talking about drinking water. This label is your guarantee of safety. It means the HDPE is virgin plastic—it’s brand new and has never held anything else before. Critically, it’s also free of harmful stuff like BPA.
A food-grade tank is built specifically to hold water for people to drink, cook with, or bathe in, without affecting its taste, smell, or quality. If you’re storing potable water, a new, food-grade tank is the only way to go. It’s never worth the risk to use a recycled tank that might have held unknown chemicals in its past life. You can check out a great selection of plastic water storage tanks designed for exactly these kinds of safe, reliable uses.
The infographic below really brings home how a tank’s capacity, footprint, and its material rating all tie together.
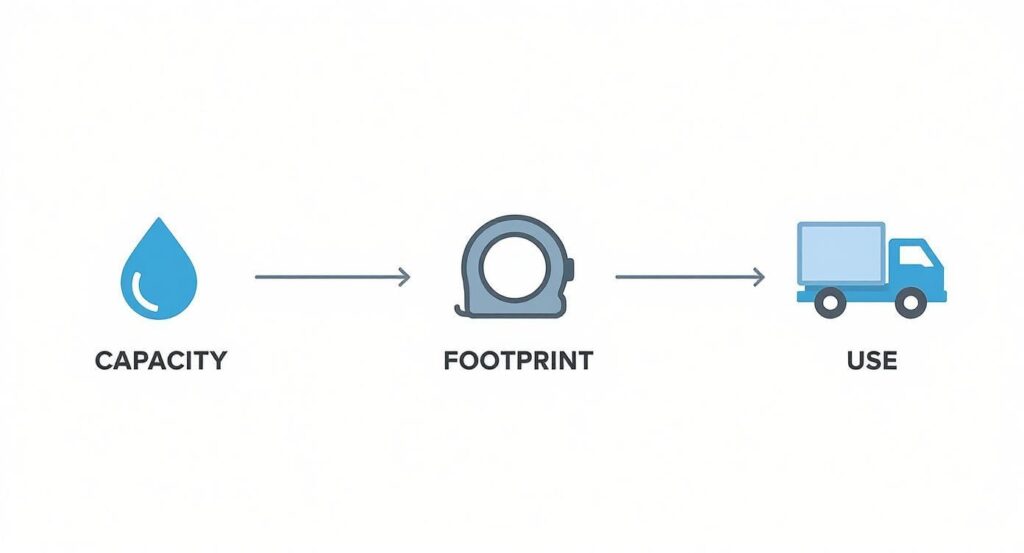
As you can see, capacity is just the beginning. The tank’s dimensions tell you where it will physically fit, but its material rating is what dictates what you can safely put inside it.
Cracking the Code: UN and DOT Ratings on IBC Totes
Ever looked at an IBC tote and noticed a long string of codes stamped on the side? Those aren’t just for decoration. They’re UN/DOT (United Nations/Department of Transportation) ratings, and they tell you the tank’s life story and what it’s built to handle.
These ratings are basically a universal language for containers that transport goods, including potentially hazardous ones.
A UN/DOT rating on a 300-gallon water tank is like a passport. It certifies the container has been put through the wringer—tested for strength, pressure, and durability—making it safe and legal to haul specific liquids down the road.
Now, if you’re just storing water on your property, a UN/DOT rating might not seem like a big deal. But if you ever plan on moving that tank while it’s full, it becomes absolutely critical. This is especially true if you’re transporting anything other than pure water, like liquid fertilizer or other farm chemicals.
The code itself tells you everything. For example, a common rating like “UN 31HA1/Y” breaks down like this:
- 31: It’s a rigid IBC built for liquids.
- H: The material is plastic.
- A: It’s the kind with a protective steel cage.
- Y: This is the Packing Group rating, meaning it’s approved for medium-danger goods.
Knowing how to read these codes means you’re picking a tank that’s not just good for storage, but also completely safe and compliant if you ever need to transport it. It’s about making sure you have the right tool for the entire job.
New, Rebottled, or Reconditioned: Which Is Best?
When you’re in the market for a 300-gallon water tank, especially an IBC tote, you’ll quickly discover there are three main types: new, rebottled, and reconditioned. These aren’t just fancy industry terms; they describe the tote’s condition, and picking the right one is a big deal for both your budget and your safety.
Making the right choice from the get-go means your tank will be perfectly suited for its job, whether you’re storing fresh drinking water or mixing up a batch of fertilizer for the farm.
The Pristine Choice: New IBC Totes
A new IBC tote is straight off the factory line—a completely fresh unit from top to bottom. The inner plastic bottle and the outer protective steel cage are both brand new and have never seen a drop of anything. This is your top-tier option, giving you the highest possible level of safety and quality assurance.
Because it has zero history, a new, food-grade IBC is the only choice for storing potable water. If your tank will hold drinking water for people, livestock, or be used in food processing, you simply can’t compromise. Using anything else introduces a risk of contamination from whatever the tank held before, and that’s a gamble you never want to take. For these critical applications, dedicated potable water storage tanks are the only safe way to go.
The Smart Compromise: Rebottled IBC Totes
A rebottled IBC tote is a smart hybrid, offering a great balance of safety and savings. It’s made up of a brand-new, virgin plastic inner bottle that’s been fitted inside a used, inspected, and certified steel cage. You get the peace of mind that comes with a fresh, untouched container, but at a lower cost because the durable outer cage is being reused.
This makes rebottled totes a fantastic pick for all sorts of jobs where purity is key, but the expense of a completely new unit isn’t necessary.
- Agricultural Chemicals: Perfect for holding fertilizers or pesticides where you can’t risk cross-contamination from a previously used tank.
- Food-Grade Ingredients (Non-potable): Ideal for liquids like certain animal feeds or process ingredients that won’t be directly consumed by people.
- Soaps and Detergents: A clean, reliable container without the premium price of a fully new tote.
Think of it like getting a brand-new water bottle but reusing the sturdy carrying case it came in. The part that actually touches your liquid is pristine, while the structural shell is recycled, passing the savings on to you.
The Economical Workhorse: Reconditioned IBC Totes
Finally, we have reconditioned IBC totes. With these, both the inner plastic tank and the outer cage have been used before. The key difference is that they’ve gone through a rigorous professional cleaning, inspection, and testing process to make sure they’re safe and ready for a new life. The bottle is pressure-tested for leaks, and the valve is checked to ensure it works perfectly.
A reconditioned tote is the most budget-friendly and environmentally conscious option. It’s ideal for non-sensitive applications where the tank’s previous contents pose no risk to its new purpose.
These totes are the workhorses for countless industrial and agricultural tasks. They are a great fit for:
- Rainwater harvesting for garden or farm irrigation
- Storing non-potable water on construction sites for things like dust control
- Collecting waste oils or other non-hazardous liquids
- General utility water storage around a farm or worksite
Even though they’re professionally cleaned, you can never be 100% certain of every single thing they’ve held in their lifetime. For this reason, reconditioned tanks must never be used for drinking water or food-grade products. But for just about everything else, they offer fantastic value and get the job done reliably.
A Quick Comparison
Deciding between new, rebottled, and reconditioned really comes down to balancing cost against your specific safety needs. Here’s a simple breakdown to help you choose the right IBC tote for your project.
| IBC Type | Cost Comparison | Safety Level | Best Use Case |
|---|---|---|---|
| New | Highest | Maximum | Potable water, food/pharmaceutical ingredients, sensitive chemicals |
| Rebottled | Medium | High | Agriculture, non-potable food-grade liquids, industrial chemicals |
| Reconditioned | Lowest | Moderate | Rainwater collection, waste oil, non-potable site water, irrigation |
Ultimately, whether you need the absolute purity of a new tote, the balanced value of a rebottled one, or the economic sense of a reconditioned unit, there’s an IBC that fits your needs and budget perfectly.
How to Install and Plumb Your Water Tank
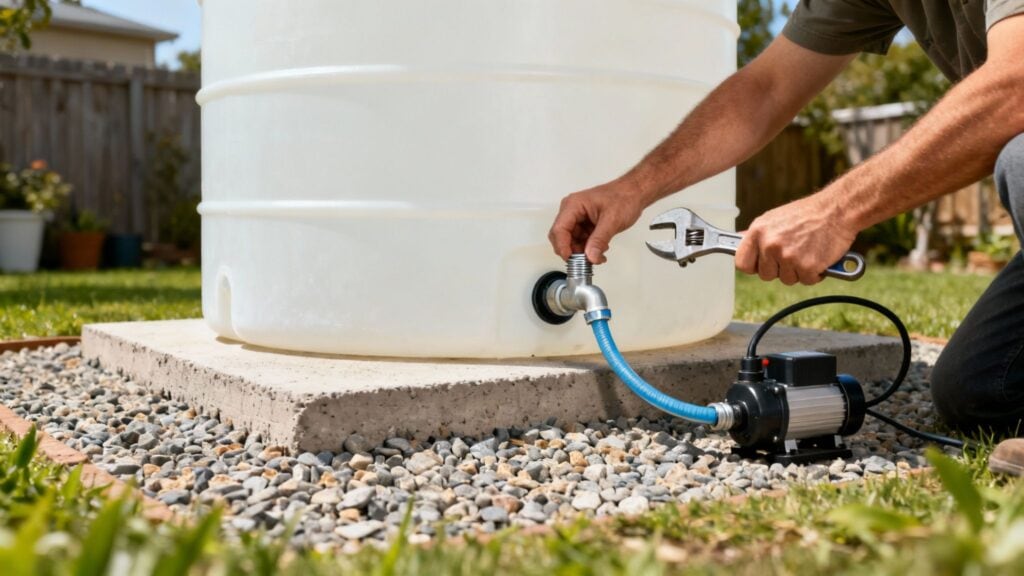
Getting your 300-gallon water tank set up properly is the key to making it work for you. A solid installation from day one saves you from a world of headaches down the road—think leaks, instability, or terrible water flow. This guide will walk you through the hands-on steps, from laying a proper foundation to making those final plumbing connections.
The whole process is pretty straightforward, but the details really matter. If you take the time to prep your site and get familiar with the fittings, you’ll end up with a reliable water storage system that will serve you well for years.
Preparing the Perfect Foundation
First things first: before your tank even shows up, you need to prepare the ground where it will live. This is the most critical step. Water is incredibly heavy, and a full 300-gallon tank weighs in at over 2,500 pounds (that’s about 1,130 kg). If your base isn’t up to the task, it will shift, settle, or even crack under that immense load, putting your whole setup at risk.
Your foundation needs to be two things above all else: perfectly level and incredibly stable. An uneven surface puts constant, uneven stress on the tank walls, which is a recipe for structural failure over time.
Here are a few solid options for a base:
- Compacted Gravel Pad: A bed of crushed stone or gravel, at least four inches deep and properly tamped down, is a great choice. It creates a solid base that also drains well.
- Concrete Slab: For a truly permanent installation, nothing beats a reinforced concrete pad. It offers unmatched stability and will last a lifetime.
- Pressure-Treated Wood Platform: A well-built deck or platform can also work, but only if it’s properly engineered to handle well over 2,500 pounds.
A quick but crucial tip: the ground underneath your base is just as important. Never, ever place a heavy tank on soft, muddy, or loose soil. You have to make sure the ground itself is compacted and stable for a safe, lasting installation.
Understanding Your Tank Fittings
Once your tank is sitting securely on its new base, it’s time to get the plumbing sorted. This is where most people get tripped up, specifically with the valve threading. Most IBC totes and a lot of poly tanks come with a valve that has a Buttress thread, which is very different from the standard tapered threads you’d find on typical plumbing pipes at the hardware store.
A Buttress thread is a coarse, heavy-duty thread designed for industrial containers. It seals incredibly well but won’t connect directly to your garden hose or PVC pipe. That’s where adapters come into play.
To hook up your tank, you’ll almost certainly need an adapter that converts the Buttress thread to a more common standard, like:
- National Pipe Thread (NPT): This is the standard tapered thread used for most plumbing pipes and fittings here in North America.
- Garden Hose Thread (GHT): This one’s pretty self-explanatory—it lets you connect a standard garden hose right to your tank’s valve.
Choosing the right adapter is the first step to a leak-free setup. Always double-check the size and thread type of your tank’s valve outlet before you buy any fittings.
Connecting Hoses and Pumps
With the right adapters in your toolkit, you can now set up your system for whatever you need it to do. Most setups fall into one of two categories: a simple gravity-fed system or a more powerful pump-assisted system.
1. Creating a Gravity-Fed System
This is the easiest way to get water flowing. It works by simply elevating the tank—the higher the tank, the more water pressure you get. It’s a simple rule of physics: for every 2.31 feet you raise the tank, you gain about 1 PSI (pounds per square inch) of pressure.
Here’s how to build it:
- Place your 300-gallon water tank on a sturdy, elevated stand or platform.
- Screw your Buttress-to-NPT or GHT adapter onto the main valve.
- Connect your hose or pipe to the adapter. If you’re using NPT fittings, be sure to wrap the threads with seal tape for a watertight connection.
This kind of setup is perfect for low-pressure jobs, like running a drip irrigation system or just filling up watering cans.
2. Integrating a Water Pump
If you need more oomph for sprinklers, a pressure washer, or to supply water to a cabin or workshop, then a pump is the way to go. An on-demand water pump is ideal, as it kicks on automatically whenever you open a tap, giving you consistent pressure.
Here’s how to install a pump:
- Connect a short, flexible hose from the tank’s valve to the pump’s inlet port.
- Run another pipe or hose from the pump’s outlet to your main distribution lines.
- It’s a good idea to install a filter on the inlet side to protect the pump’s inner workings from any small debris in the water.
This configuration turns your simple storage tank into a fully functional, pressurized water source, ready for much more demanding tasks.
Simple Tank Cleaning and Maintenance Tips
Owning a 300-gallon water tank is a great move for water security, but just like any other piece of essential gear, it needs a little TLC to keep it working perfectly. A bit of regular maintenance will keep your water fresh, head off expensive problems down the road, and make sure your tank lasts for years.
The good news? Keeping your tank in prime condition is surprisingly straightforward. You don’t need a bunch of special tools or a ton of time—just a simple routine to spot small issues before they snowball.
This simple approach keeps your water supply clean and dependable, whether it’s for your garden, your animals, or as a crucial backup for your home.
Conduct Routine Visual Inspections
The easiest thing you can do is also one of the most effective: just walk around and look at it. Try to make it a monthly habit to give your tank a quick once-over. You’re just looking for any signs of wear and tear, damage, or leaks that could cause trouble.
Pay close attention to these key spots:
- The Tank Body: Keep an eye out for any cracks, fading from the sun, or signs that the tank is bulging. HDPE plastic is tough as nails, but it’s not indestructible.
- The Steel Cage (for IBCs): Check the cage for rust, bent bars, or any welds that look like they’re failing. That cage provides critical support, especially when the tank is full and pushing 2,500 pounds.
- Valves and Fittings: Look for drips or slow leaks around the main valve and any adapters you’ve connected. Give everything a gentle wiggle to make sure it’s snug and check that the valve handle turns smoothly.
A tiny drip might not seem like a big deal, but you’d be shocked how much water it can waste over time. It’s also often a sign that a seal is on its way out and will only get worse. Catching it early saves water and a whole lot of hassle.
A Step-by-Step Cleaning Guide
If you’re storing water for a long time, especially for rainwater collection or drinking water, a good cleaning is crucial to prevent algae and bacteria from setting up shop. Plan on cleaning your tank at least once a year. If you spot any gunk or a slimy feel inside, do it more often.
1. Drain the Tank Completely
First things first, get all the water out. Open up the main valve and let gravity do its thing. This is a perfect opportunity to water the garden or a patch of lawn that needs it.
2. Prepare a Safe Cleaning Solution
For any food-grade or potable 300-gallon water tank, plain old household bleach is your best friend. Just make sure it’s not the scented or coloured kind. A safe rule of thumb is about ¼ cup of bleach for every 15-16 gallons of water. For a 300-gallon tank, that’s roughly 5 cups of bleach.
This is important: always dilute the bleach in a bucket of water before you pour it into the tank. You never want to dump concentrated bleach directly onto the plastic.
3. Fill and Circulate the Solution
Once your diluted bleach mix is in, fill the tank all the way up with fresh, clean water. If you have a pump, turn it on and run all your taps for a few minutes. This pulls the sanitizing solution through all the pipes and hoses, cleaning the entire system.
4. Let It Sit, Then Drain and Rinse
Now, let the solution sit in the tank and pipes for at least 12 hours, but no more than 24. That gives it plenty of time to kill any nasties. After that, drain the whole system again.
Finally, refill the tank with fresh water and flush everything—the tank, the pipes, the hoses—until you can’t smell even a hint of bleach. You might need to rinse it two or three times to be sure. This simple process gets your water storage clean, safe, and ready for another year of reliable service.
Your Top Questions About 300 Gallon Tanks Answered
When you’re ready to get serious about bulk water storage, a few questions always come up. It’s completely normal. Getting straight answers is the key to picking the right 300-gallon water tank and making sure it works for you from the get-go.
We get these questions all the time, so we’ve put together some clear, practical answers. Let’s get these sorted so you can move forward with confidence and get your system set up.
Can I Use an IBC Tote for Drinking Water?
Yes, you can, but with one very important rule: the tank must be a brand-new, food-grade IBC tote. This means it’s made from virgin, BPA-free HDPE plastic and has never, ever held anything else. It’s the only way to be sure.
Don’t even think about using a reconditioned or used tote for potable water. You just can’t know for certain what was in it before, and the risk of contamination from old chemicals is far too high. Always check that the tank is specifically rated for potable water—it’s your family’s health on the line.
A tank’s history is everything. When it comes to drinking water, you need that history to be a blank slate. A new, food-grade tank is your only guarantee that the water you store is as clean as the water you put in.
How Much Ground Space Does a 300 Gallon Tank Need?
A standard 300-gallon water tank, like an IBC tote, has a footprint of roughly 48 by 40 inches. But in reality, you’ll need a bit more space than that to work with.
For a practical setup, you’ll want a clear, level area of at least 5 feet by 4 feet. This gives you enough room to get around it, hook up hoses, and do routine checks. Most importantly, make sure the ground is solid and compacted. When full, that tank will weigh over 2,500 pounds, and you need a base that can handle it.
What Is a Buttress Thread on My Tank Valve?
If you look at the valve on most IBC totes, you’ll see a very coarse, heavy-duty thread. That’s a Buttress thread. It’s designed for industrial use to create a really strong, leak-proof seal.
This isn’t the same as the finer NPT (National Pipe Thread) you find on your home plumbing or garden hose. The good news is that you just need a simple adapter to connect the two. These adapters are easy to find and make it a breeze to hook up standard hoses and fittings to your tank.
Can I Bury a Poly Tank or IBC Tote Underground?
Absolutely not. Your standard above-ground poly tank or IBC tote is not built to be buried. The weight and pressure of the earth around it will crush the tank, causing it to buckle and fail completely.
If you need underground water storage, you have to buy a tank that’s specifically designed for it. These are much more robust and are engineered to withstand all that subterranean pressure without collapsing.
For a reliable supply of new, rebottled, and reconditioned tanks, trust IBC Tanks Canada. Check out our full inventory and find the perfect 300-gallon water tank for your needs at https://ibctanks.ca.

